My family adopted a sweet little pup a couple of months ago. Her name is Penny. She is so lovable, but she takes a little while to warm up to new people. Some dogs are like this. It makes it even harder to photograph them if you take them to a professional though because they have to spend so much time getting used to the photographer. I took pictures of my own dog. Since I'm her owner, I didn't have to go through that.
Here are 5 tips to help you take better pictures of your dog.
1. Let Your Dog Get Used To The Camera
If your dog has the chance to sniff the camera and here the shutter a couple time before you point it in their direction, they'll feel more comfortable when you start taking pictures of them.
2. Wear Your Dog Out Before You Start
Photographing dogs are like photographing children. They are active. They hardly ever sit still and it's not an easy job getting cute and beautiful photos from them. If they're worn out from playing before you start, you can get some nice relaxed shots. I don't suggest doing this when it's super hot outside or you'll get a lot of panting (giant tongue stuck out-which can sometimes be cute, but you don't want all your photos to look like this). Get some practice shots in while they're playing or running around. You know how I compared dogs to children? Well, just like children, sometimes dogs are even cuter when they're sleeping! If you get them tired enough, you might get some of these too.
3. Be Patient
Your dog is most likely not going to be 100% cooperative 100% of the time. Be patient. Wait it out. Chances are, if you wait for them to get their initial shyness or overwhelming urge to be crazy out, you'll get some amazing shots. Better yet, always keep your camera with you. That way, if you see the opportunity arise where your dog looks adorable or her surroundings really speak to who she is, you'll be ready.
4. Get Low
You don't want too many shots of your dog's head. If you get down to their level (unless you have a seriously massive dog) you'll get better profiles and straight on shots.
5. Use A Tripod If Your Dog Is Too Freaked By The Camera
Some dogs are not into seeing their owner disappear behind a camera. They see you hiding and think they're supposed to come find you. Sometimes, you can get some good shots still, but I suggest using a tripod. If you set up a tripod, use a remote shutter release, and stand just to the side of your camera, you can make funny faces and noises to get some cute looks from your pup.
Good luck with your dog's photography session. There are a lot of things to consider when taking pictures such as the lighting, aperture, ISO, background, etc. These are things to think about when photographing children, families, pets, couples, or anything really. These tips are to help you with your dog. We'll get into the tough stuff later.
...the perfect house, the perfect husband, the perfect son, the perfect dog, and you...the perfect you. You can cook, clean, craft, photograph, and pretty much do anything better than anyone else. That's the dream, huh? I have news for you. I love living in my imperfect world.
Monday, September 23, 2013
Tuesday, August 6, 2013
Literary Genius!
Do you love books as much as I do? I have always been incredibly jealous of Belle. She get's to be in that beautiful library because she was able to accept the beast. I would accept the beast if I got that library!
Well, I was reading my Family Circle magazine this morning when I saw something amazing. It was on page 25 (so pretty early in the magazine). It was a page of décor items for us book lovers. I know a lot of you probably don't get this magazine so I want to share with you what I found! Enjoy!
You can find this pillow at society6.com for $27.
These 'bookends' can also be used as vases since their tops are open. You can find them at elizabethsembellishments.com. They cost $20.95 for one 'bookend'.
You can find this mug at us.penguingroup.com for $9.95.
You can find this set of 8 coasters at outofprintclothing.com for $20.
You can find this amazing clock at uncommongoods.com for $24. I actually shop here a lot.
I love all of these things. Are you going to buy any?
Well, I was reading my Family Circle magazine this morning when I saw something amazing. It was on page 25 (so pretty early in the magazine). It was a page of décor items for us book lovers. I know a lot of you probably don't get this magazine so I want to share with you what I found! Enjoy!
You can find this pillow at society6.com for $27.
These 'bookends' can also be used as vases since their tops are open. You can find them at elizabethsembellishments.com. They cost $20.95 for one 'bookend'.
You can find this mug at us.penguingroup.com for $9.95.
You can find this set of 8 coasters at outofprintclothing.com for $20.
You can find this amazing clock at uncommongoods.com for $24. I actually shop here a lot.
I love all of these things. Are you going to buy any?
Tuesday, June 18, 2013
Help me name my puppy!
My husband and I have made the choice to adopt a puppy. We're really excited about it and so is our 3-year-old son. We've picked out a dog and we're just in the middle of the adoption process. They're reviewing our application right now so there's no guarantee that we'll get this specific dog, but we WILL get a dog! Currently, we're looking at this dog:
She is a baby Boston Terrier. We've had a rough time coming up with names though. That's where all of you come in! Please help us come up with names! GIRL names! (I don't know about you, but it seems a lot easier to come up with boy names.) We've thought of Astrid or Lennon, but I'm not convinced that I could ever call my dog that. HELP!!!
Wednesday, May 29, 2013
Turn your curling iron into a wand!
So I found this tutorial here for how to turn your regular curling iron into a wand curling iron. In case you don't know what that is, it's when you basically have a normal curling iron just without the clamp part. You take your hair and wrap it around the curling iron instead of twisting the curling iron. It doesn't sound like it would make that big of a difference, but I'm here to tell you it does!
Here is the tutorial to turn your regular curling iron into a wand:

It's super easy.
Here is a picture of my hair when I used to curl it using my original curling iron. It was taken only a couple hours after I was done curling it.

It's not so great, huh?
Well, this is what my hair looked like this past weekend 12 hours after I curled it with my 'wand'.

It looks so much better, right? I hope this was helpful to you! If you have any questions, leave them in the comments below!
Here is the tutorial to turn your regular curling iron into a wand:

It's super easy.
Here is a picture of my hair when I used to curl it using my original curling iron. It was taken only a couple hours after I was done curling it.
It's not so great, huh?
Well, this is what my hair looked like this past weekend 12 hours after I curled it with my 'wand'.
It looks so much better, right? I hope this was helpful to you! If you have any questions, leave them in the comments below!
Tuesday, May 28, 2013
Striped Wall
I have another paint project for you guys! We painted our bedroom this time. We decided to go for stripes.
You should first paint your 'background color'. We used the color of our other 3 walls as the top, middle, and bottom stripes, making it our 'background color'. Then, we measured our wall, and drew out the lines. We then taped everything off.

We painted one color, waited for it to dry, taped off the other stripe, and then painted our third color.

Show me your paint projects in the comments! I need new ideas for the rest of my new home.
You should first paint your 'background color'. We used the color of our other 3 walls as the top, middle, and bottom stripes, making it our 'background color'. Then, we measured our wall, and drew out the lines. We then taped everything off.

We painted one color, waited for it to dry, taped off the other stripe, and then painted our third color.

Show me your paint projects in the comments! I need new ideas for the rest of my new home.
Friday, May 24, 2013
Mother's Day Gift Basket
Alright everyone, I know that Mother's Day is long over, but this can be used for any holiday or birthday. I have one of those mothers that has everything. She wants for nothing and is incredibly hard to buy for! So what did I do? I made a relaxing gift basket. I decided to just go to Target, find a basket, and go from there. This is what I came up with:


Basket $7
Food Network Magazine $4
Wine $7
Candle $5
Candy $4
Magnetic Note Pad $1
Total $28
I made this basket personalized to my mom. She loves finding new recipes. She loves drinking wine (I did have to call my sister to find out what kind she likes though). She loves sugar free candy. What are some things that you would put in your gift basket?


Basket $7
Food Network Magazine $4
Wine $7
Candle $5
Candy $4
Magnetic Note Pad $1
Total $28
I made this basket personalized to my mom. She loves finding new recipes. She loves drinking wine (I did have to call my sister to find out what kind she likes though). She loves sugar free candy. What are some things that you would put in your gift basket?
Tuesday, May 21, 2013
Argyle Bathroom
Alright guys! I'm super excited to finally show you something that we've done in our home. Today, we're going to start with the basement bathroom. We painted it when we painted the rest of the basement. Here's what the wall looked like before:

Before we bought our house, I found this on pinterest (of course). I NEEDED to put something similar in my house. At first, I didn't know where, but I eventually found a spot. The basement. Some people may think "really? the basement?" but you have to understand our basement. It is basically a HUGE living room with a half bath. This is the place that we're going to spend most of our time.
Ok, so the first thing I did was make a plan. You'll have to take measurements of your room and plan accordingly. My plan looked like this:

We painted the bathroom the same color as the rest of the basement. Then, we added the diamonds of the argyle. I would say the worst part of this whole thing is the taping. All of your measurements need to be exact! Here, I taped off the lines.

Once I painted those lines and took off the tape, we finally had our finished project! I love it!

Share your painting projects in the comments below! I want to see what you've done. I love seeing other people's ideas. Thanks for stopping by and stay tuned for more projects!
Before we bought our house, I found this on pinterest (of course). I NEEDED to put something similar in my house. At first, I didn't know where, but I eventually found a spot. The basement. Some people may think "really? the basement?" but you have to understand our basement. It is basically a HUGE living room with a half bath. This is the place that we're going to spend most of our time.
Ok, so the first thing I did was make a plan. You'll have to take measurements of your room and plan accordingly. My plan looked like this:

We painted the bathroom the same color as the rest of the basement. Then, we added the diamonds of the argyle. I would say the worst part of this whole thing is the taping. All of your measurements need to be exact! Here, I taped off the lines.

Once I painted those lines and took off the tape, we finally had our finished project! I love it!

Share your painting projects in the comments below! I want to see what you've done. I love seeing other people's ideas. Thanks for stopping by and stay tuned for more projects!
Tuesday, April 30, 2013
Chicken and Mozzarella Roll-Up
Today, I will show you a really easy dinner you can make.
All you will need is:
boneless skinless chicken breasts
salt
pepper
any other spices you want (we used Garlic Garlic, Onion Onion, and Dill)
string cheese
Directions:
1. Preheat your oven to 350 degrees.
2. Pound out your chicken until it's about half an inch thick.
3. Sprinkle your spices onto the chicken. We used salt, pepper, Garlic Garlic, Onion Onion, and dill.
4. Place your piece of string cheese at one end of the chicken and roll it up. You can use a toothpick to keep it in place if it won't stay by itself.
5. Place on a baking pan that's been sprayed with non-stick spray. Bake for about 20 minutes. Enjoy!
All you will need is:
boneless skinless chicken breasts
salt
pepper
any other spices you want (we used Garlic Garlic, Onion Onion, and Dill)
string cheese
Directions:
1. Preheat your oven to 350 degrees.
2. Pound out your chicken until it's about half an inch thick.
3. Sprinkle your spices onto the chicken. We used salt, pepper, Garlic Garlic, Onion Onion, and dill.
4. Place your piece of string cheese at one end of the chicken and roll it up. You can use a toothpick to keep it in place if it won't stay by itself.
5. Place on a baking pan that's been sprayed with non-stick spray. Bake for about 20 minutes. Enjoy!
Tuesday, April 9, 2013
S'Mores Housewarming Gift
It seems like everyone we know is buying a house right now! My sister just bought one last fall, 2 of our friends that are getting married this summer built a house this past winter, and 2 of our other friends literally just moved into their new home a week and a half ago. I thought it would be nice to bring them something just to show that we care. Since we're currently packing, we don't have a ton of time to make something extravagant. We also don't have a ton of extra money. Here's what I came up with and it cost me less than $10! (Sorry about the bad quality pictures. I made this pretty quick and brought it right over to our friends.)


I wrote a little poem for them. If you're not into poems or you think they're too cheesy (cause let's be honest, they kind of are), just put some kind of tag on it that says "Welcome to your new home!"

I bought this lantern from Hobby Lobby. It's originally listed for $9.99, but there's almost ALWAYS a coupon online for 40% off one regular priced item, making it only about $6! They come in almost any color, too. The little 'can' that you see at the bottom is like a Sterno can. You open it up, light it on fire, and use it to roast your marshmallows. I got this one from Dollar Tree. I put enough stuff in there to make 8 s'mores (4 skewers, 8 marshmallows, 16 graham crackers, and 2 chocolate bars). I originally put the marshmallows and graham crackers in Ziplock bags, but then I remembered that I had some leftover treat bags (which you can also get at Dollar Tree). It looks much classier with these bags.

This is what you get! Our friends loved their gift!
Here's a rundown of the costs:
Lantern $6
'can of fire' $1
chocolate bars $1 (I actually got a package of 6 that cost $3)
Marshmallows FREE (I already had some)
Graham Crackers FREE (I already had some)
Treat Bags FREE (I already had some)
Skewers FREE (I already had some)
Total Cost $8
Even if you have to go out and buy everything, it should cost you less than $15. That's still a pretty good deal in my book.
Leave your ideas for what to put in a Housewarming Gift Basket in the comments below!
Thursday, April 4, 2013
Pirate Party
My son turned 3 on March 24th. Oh they grow up so fast. He's potty trained, he talks more than anyone I know, and he's SO active! I love this little boy. If you would like to see pictures that I've taken of him recently, check out my photography blog here.
Anyway, have any of you heard of Jake and the Neverland Pirates on Disney Junior? Well, my son LOVES it! He has tons of Jake and the Neverland Pirate toys and he loves watching the TV show and he even runs around yelling "Ahoy Mateys!" I decided to do a mix of generic pirate things and actual Jake and the Neverland Pirate things.
Since I'm a stay-at-home mom, my son doesn't really have any friends his own age so this party was mostly for family and family friends. My son was actually the only child there. However, I still tried to make this a kid friendly party. Since there were no kids besides my son, we didn't play any games, but it was still a great party!
DECOR

We cut a whole bunch of black lines to look like the dotted lines on a map that lead to the treasure. We started at the door where you enter and put the giant red X (made of red poster board) over the food table, which ended up being on the opposite wall.

We decided to get our son a pop up Bucky so we just set it up and used it as a decoration. He was so surprised when he walked in and saw it.

You can find these Jolly Roger flags on Amazon for pretty cheap. And this flag was HUGE! It was a great use of wall space.
FOOD

This is the cake! You may recognize it from the post I did a couple days ago. It's super easy and really cute!

You can see some of the food that we had, but it wasn't all out yet when I took this picture. We had cheese, crackers, meatballs, fruit salad in a pirate ship watermelon, goldfish, Cheetos, veggies and dip, and cookies.

These cookies are pretty easy to make. Just make sure that you go slow and don't try to rush the icing.

ACTIVITIES

There was a dress up area that had eye patches and cardboard pirate hats.

We also had a photo prop. I thought it was pretty funny.

You could also apply your own temporary pirate tattoo.

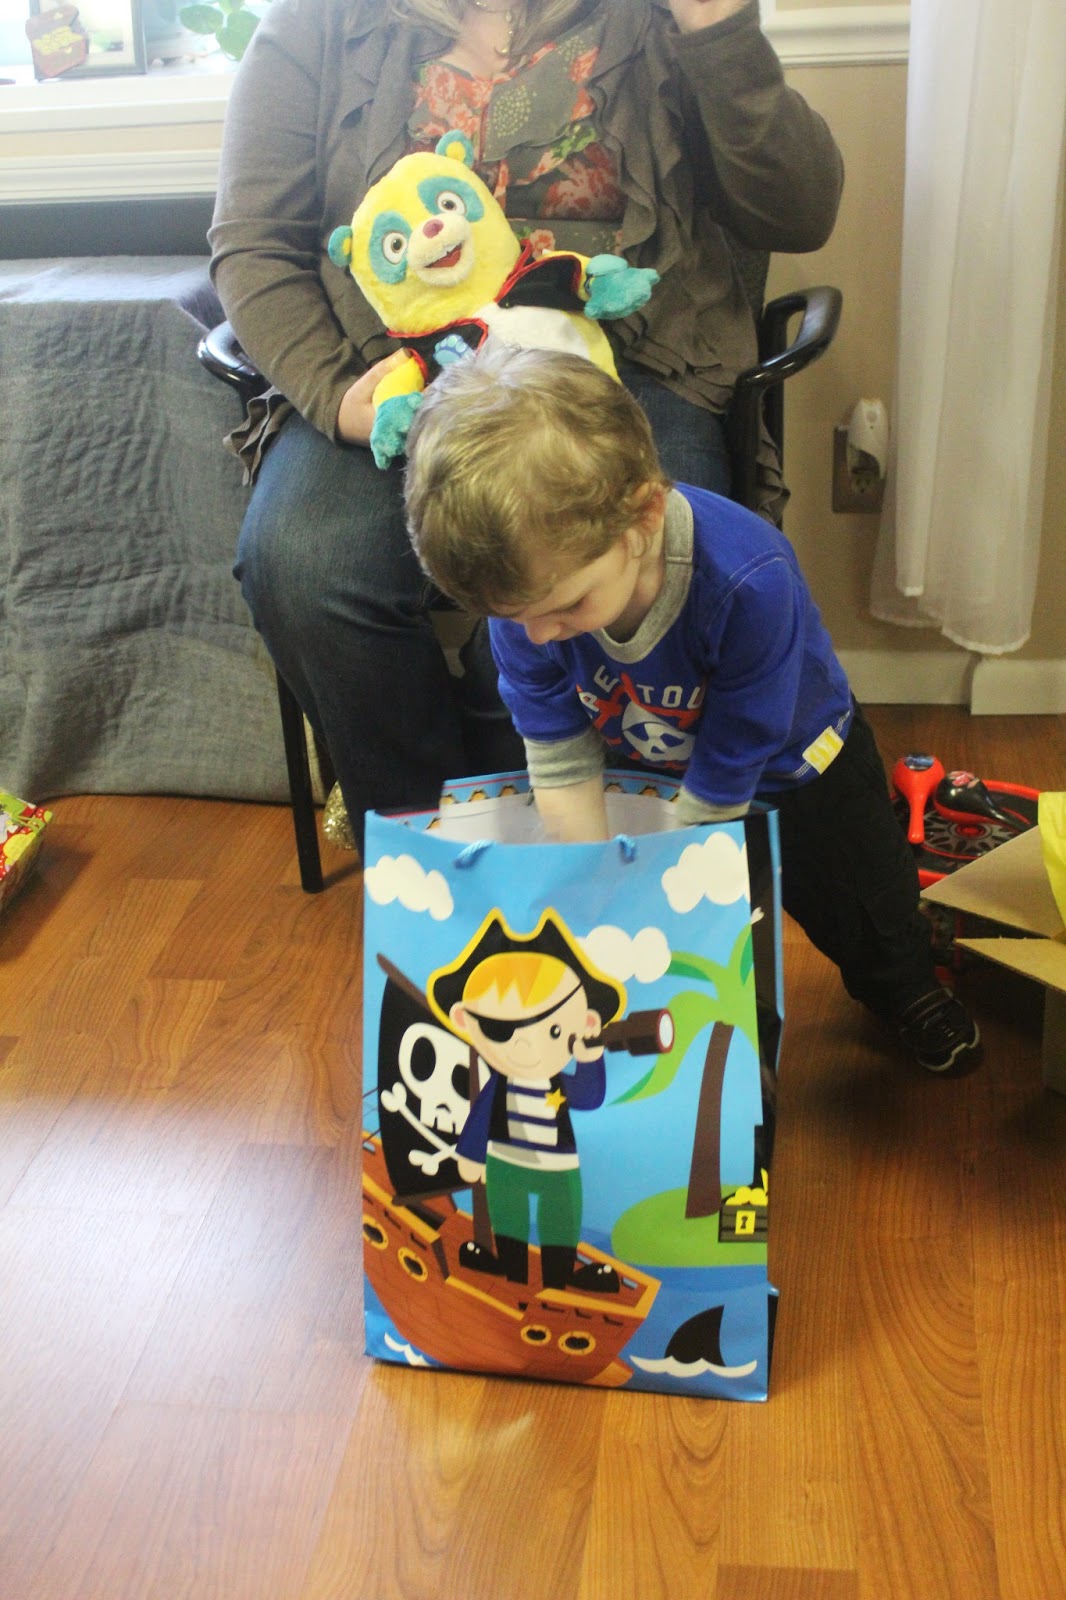
And then, of course, my son opened his presents.
We really enjoyed our party. I hope that you can take some of our ideas and make them your own.
Anyway, have any of you heard of Jake and the Neverland Pirates on Disney Junior? Well, my son LOVES it! He has tons of Jake and the Neverland Pirate toys and he loves watching the TV show and he even runs around yelling "Ahoy Mateys!" I decided to do a mix of generic pirate things and actual Jake and the Neverland Pirate things.
Since I'm a stay-at-home mom, my son doesn't really have any friends his own age so this party was mostly for family and family friends. My son was actually the only child there. However, I still tried to make this a kid friendly party. Since there were no kids besides my son, we didn't play any games, but it was still a great party!
We cut a whole bunch of black lines to look like the dotted lines on a map that lead to the treasure. We started at the door where you enter and put the giant red X (made of red poster board) over the food table, which ended up being on the opposite wall.
We decided to get our son a pop up Bucky so we just set it up and used it as a decoration. He was so surprised when he walked in and saw it.
You can find these Jolly Roger flags on Amazon for pretty cheap. And this flag was HUGE! It was a great use of wall space.
FOOD
This is the cake! You may recognize it from the post I did a couple days ago. It's super easy and really cute!
You can see some of the food that we had, but it wasn't all out yet when I took this picture. We had cheese, crackers, meatballs, fruit salad in a pirate ship watermelon, goldfish, Cheetos, veggies and dip, and cookies.
These cookies are pretty easy to make. Just make sure that you go slow and don't try to rush the icing.
ACTIVITIES
There was a dress up area that had eye patches and cardboard pirate hats.
We also had a photo prop. I thought it was pretty funny.
You could also apply your own temporary pirate tattoo.
And then, of course, my son opened his presents.
We really enjoyed our party. I hope that you can take some of our ideas and make them your own.
Subscribe to:
Posts (Atom)


.jpg)